
Trail Data consists of three types of data.
- Trails – GPS Data (GIS) which is precise trail data as collected from clubs/counties/states.
- Map Images – which are digital copies of the previously used paper maps.
- My Trails – which are trails you have recorded (see Map Your Own Trails).
Once you have downloaded Trails and Map Images and/or Recorded some trails, you can customize how you want the app to show them. For this, the layers icon ![]() in the middle at the bottom is used.
in the middle at the bottom is used.
The app starts out using the Base Map as a background. The Base Map is Apple Maps for IOS devices, Google Maps for Android devices. If you would rather see the Map Images (paper maps) as the background, press the layers icon and select Show Map Images.
Note you can see the advertising part of the paper maps by pressing this symbol in the upper right corner of the screen: ![]() It will toggle between the Map Image and the Map Ads.
It will toggle between the Map Image and the Map Ads.
If you would like to see Trails (both on top of the Base Map or On Top of the Map Images) press the layers icon and select Show GPS Trails.
If you would like to see trails that you have previously recorded, press the layers icon and select Show My Trails.
Note: you can change the colors of Trails and My Trails under Preferences by pressing the hamburger icon in the upper left and selecting Customize Trail Colors.
Below are some examples:
Map Image, Trails Displayed and My Trails Displayed
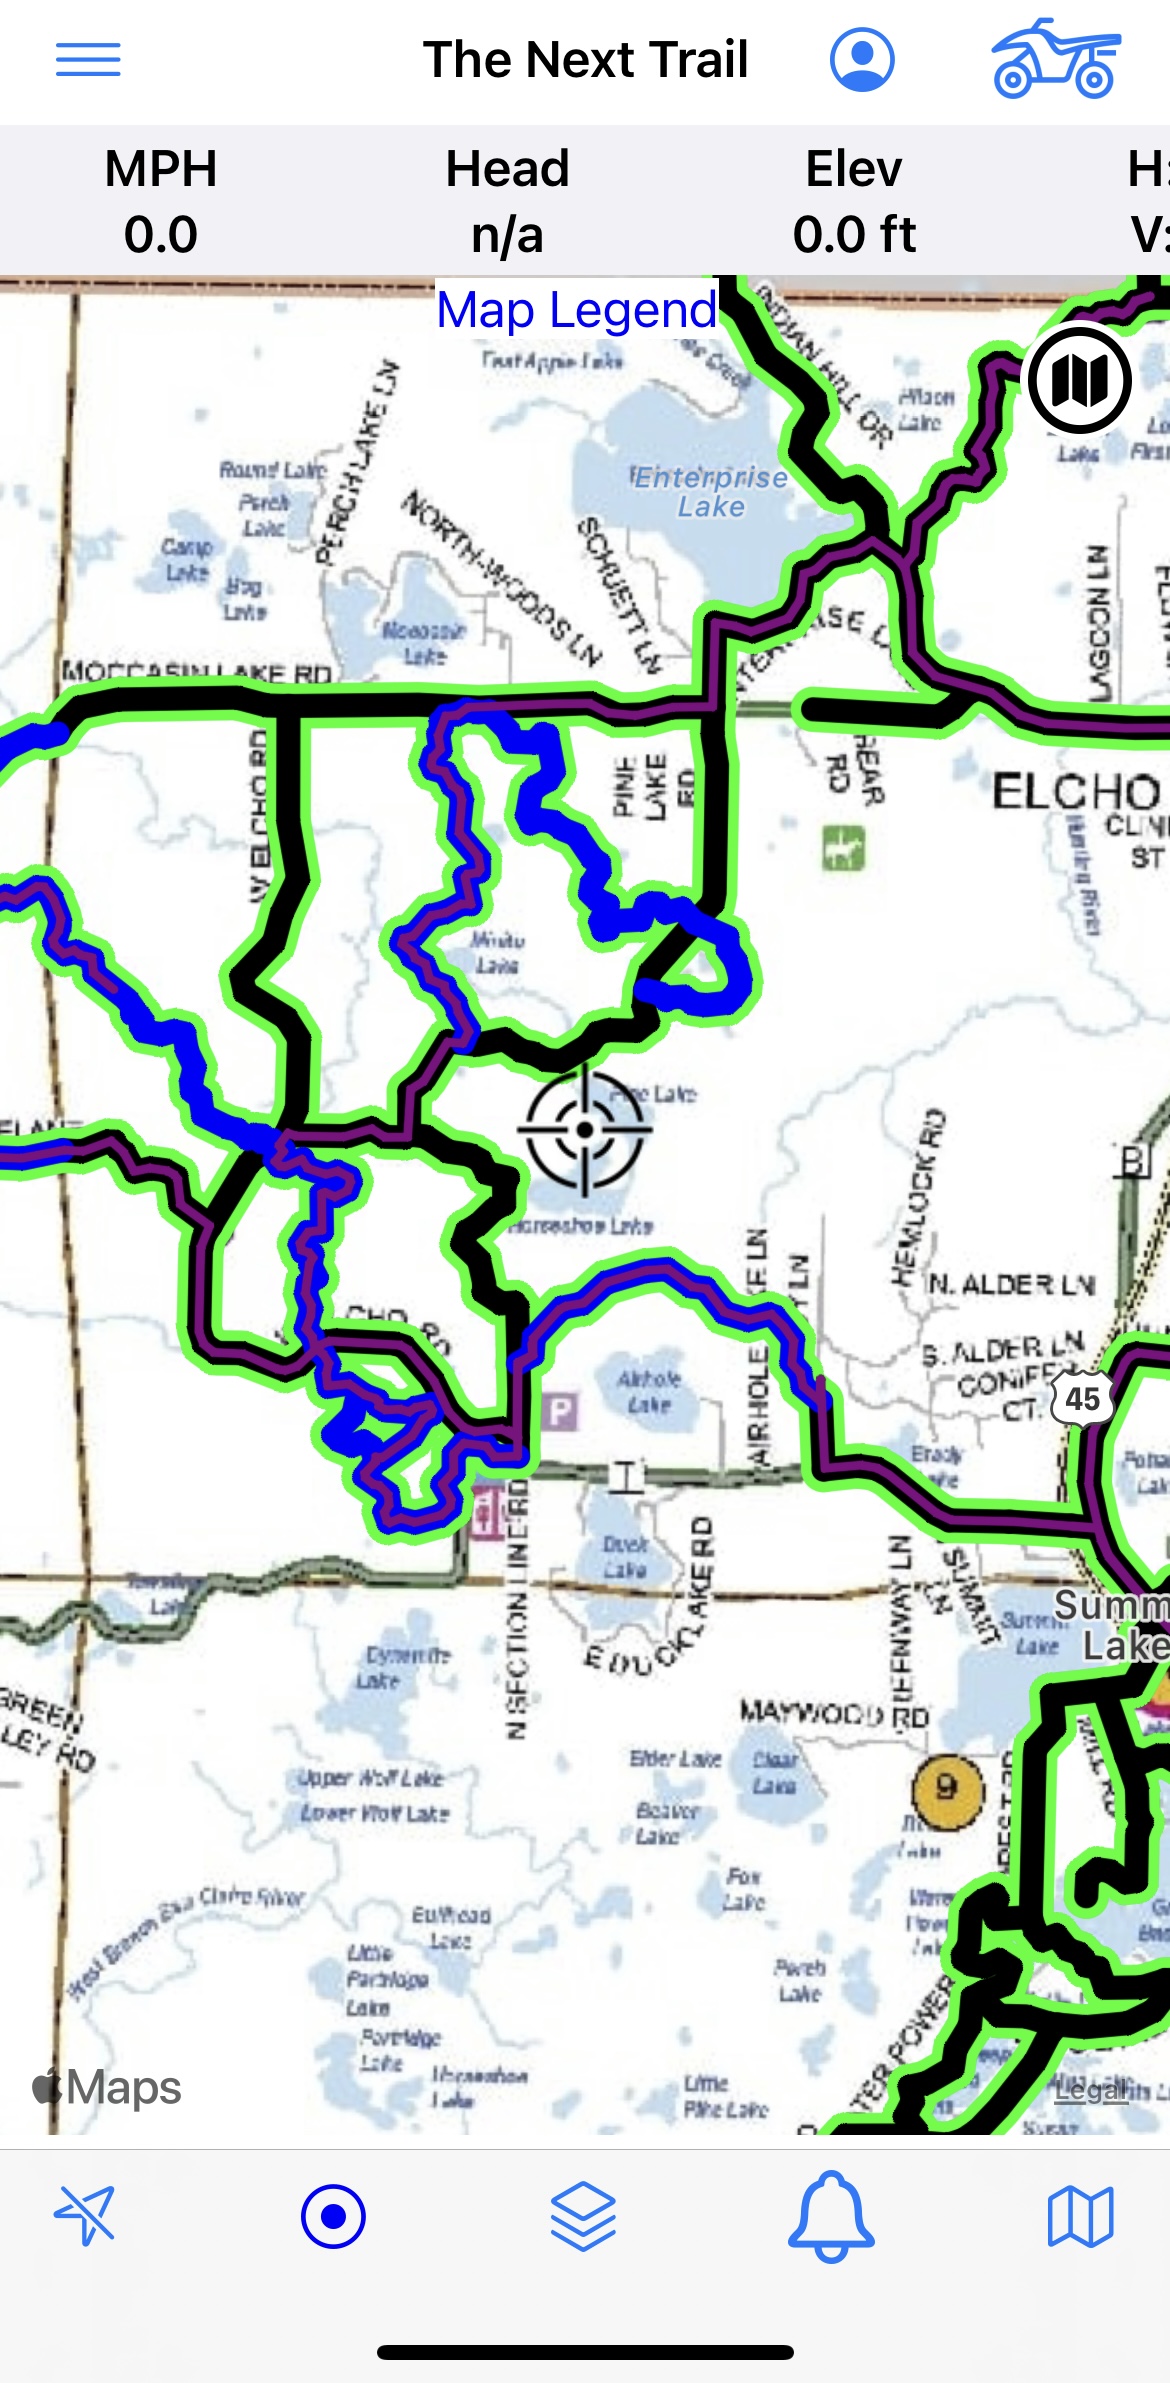
Notice that My Trails are in Purple. GPS Trails are in Blue, Road Trails are in Black. The map in the background comes from a paper map.
Base Map (in this case Apple Maps) with Trails Displayed and My Trails Displayed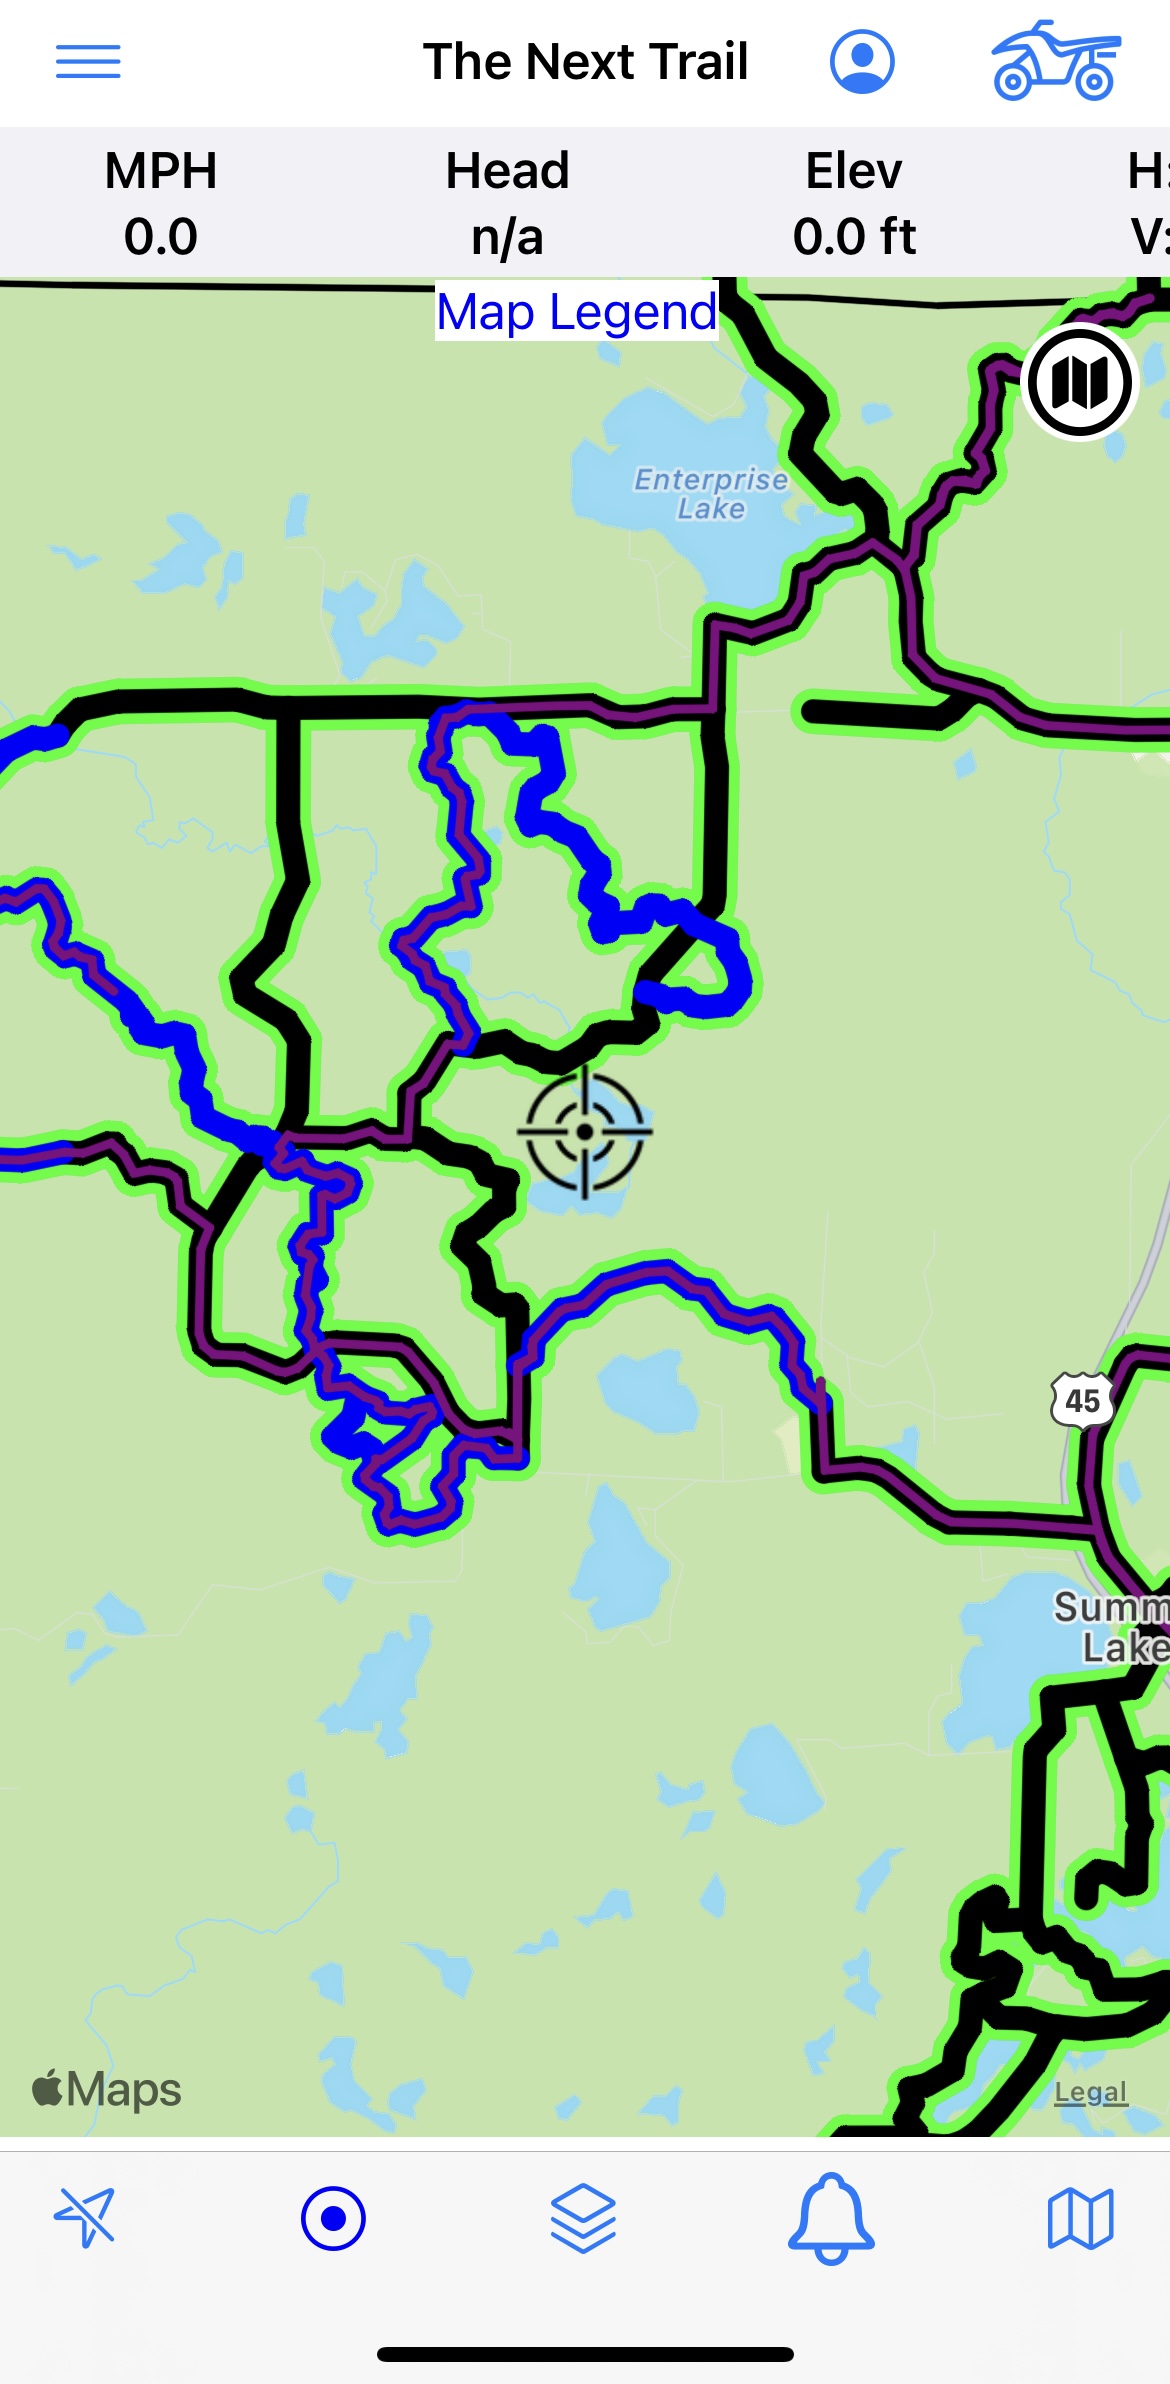
My Trails are in Purple. GPS Trails are in Blue, Road Trails are in Black.
Base Map (in this case Apple Maps) with only Trails Displayed
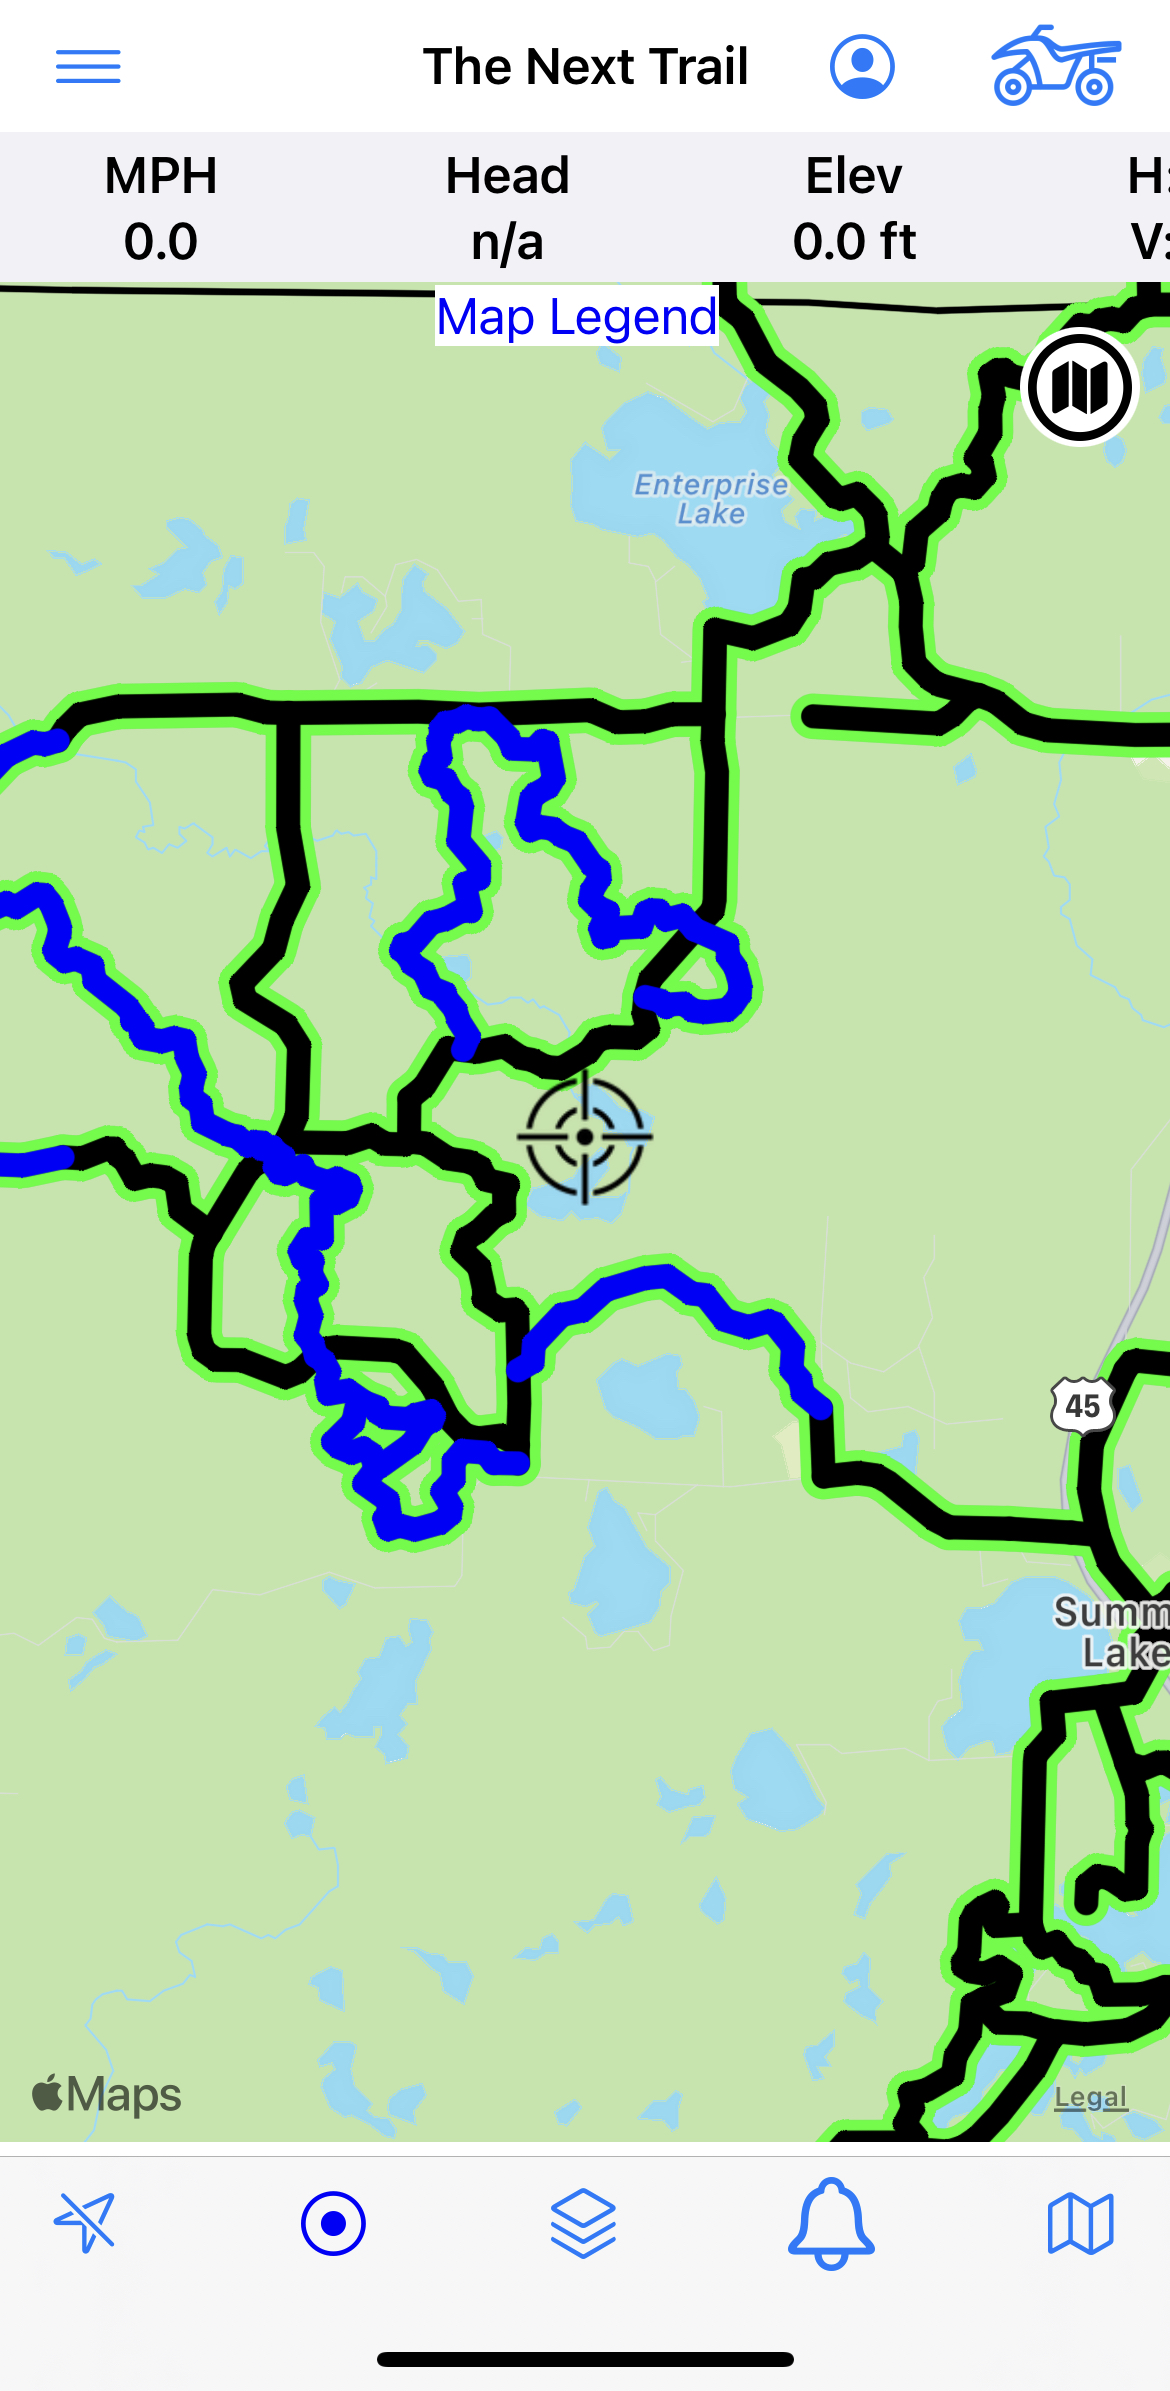
GPS Trails are in Blue, Road Trails are in Black.